 |
Image Courtesy: Frank Nashick slow down ©2010
http://www.yessy.com/underdareef/
Just another WordPress.com weblog
February 28, 2011
|
Image Courtesy: Frank Nashick slow down ©2010
http://www.yessy.com/underdareef/
February 25, 2011
health and wellbeing Chlorophyll, health, home grown, wheat grass Leave a comment
 “The Nutrient Density in One Ounce of Wheatgrass is Equivalent to 2.5 pounds of the choicest vegetables.” “The Nutrient Density in One Ounce of Wheatgrass is Equivalent to 2.5 pounds of the choicest vegetables.”
|
| For my money, this is one of the greatest superfoods one can get. We bought some wheat berries at 50¢ or 60¢ a kilo. Some black earth, a few bucks a bag. My wife Suzanne, whom I call Zan, had some algae already, so she uses that to spray the wheatgrass as it gets on its way.
True, it does take time, but if you calculate the time per day, it comes out to about 10 minutes per day. It takes about seven days, in good growing conditions. That’s not a lot considering the overall health benefits of chlorophyll. In this article, I will go over the steps one would take in order to cultivate wheatgrass, as if is displayed in the picture above, and will be displayed in other pics that I will add in this article. I will go step by step, and try to make it as easy to understand as possible, after all it isn’t rocket science. Equipment: The equipment that you need are as follows:
|
 Xara Photo & Graphic Designer: Xara Photo & Graphic Designer:Xara Photo & Graphic Designer 6 (formerly Xtreme) is quite simply the best value and fastest all-in-one graphics package you’ll find. For drawings or photo work, for print or web graphics, it’s the perfect choice. |
|
| Find out more | Retail: $89 |
February 23, 2011
As You Slide Down the Banister of Life
in 2011- Remember

1. Jim Baker and Jimmy Swaggert have written
An impressive new book. It’s called …….
‘Ministers Do More Than Lay People’
2. Transvestite: A guy who likes to eat, drink
And be Mary..
3. The difference between the Pope and
Your boss, the Pope only expects you
To kiss his ring.

4. My mind works like lightning, One brilliant
Flash and it is gone.
5. The only time the world beats a path to
Your door is if you’re in the bathroom.
6. I hate sex in the movies. Tried it once.
The seat folded up, the drink spilled and
That ice, well, it really chilled the mood.
7. It used to be only death and taxes
Now, of course, there’s
shipping and handling, too.

8. A husband is someone who, after taking
the trash out, gives the impression that
he just cleaned the whole house.
9. My next house will have no kitchen – just
Vending machines and a large trash can.
11. Definition of a teenager?
God’s punishment… for enjoying sex.
12. As you slide down the banister of life, may
The splinters never point the wrong way.
Be who you are and say what you feel…
Because those that matter…
don’t mind… and those that mind…
Don’t matter!
© Note: Sorry I can not give copyright information, as I do not have it. If this is yours and you wish me to remove it, please let me know, and I will remove it immediately. – bri
February 22, 2011
|
I’ve noticed, more and more, that more and more people these days are in a hurry to slow-down! – aad sach singh
|
Image Courtesy: Frank Nashick slow down ©2010
http://www.yessy.com/underdareef/
February 21, 2011
health and wellbeing, Sociaty meat substitute, Seitan, vegan meat substitute, wheat gluten Leave a comment
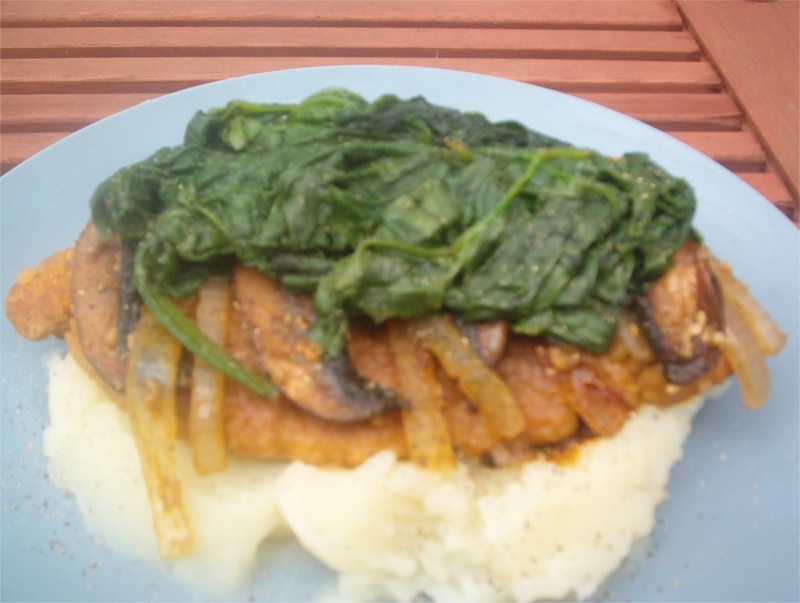
 I made a post on Facebook the other day, and it was concerning carbonara sauce for vegetarians, or vegans. I mentioned that this could be easily accomplished by using – and making – seitan or tofu and dehydrating it in little pieces and frying them up. A good friend of mine asked me for the recipes for the seitan and tofu. I will present the seitan recipe here and do another post for the tofu later, as tofu has so many variations.
Prelude:
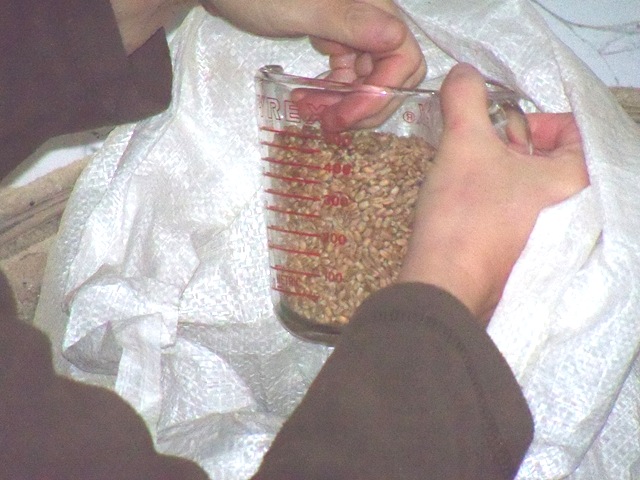
When I first made seitan I was more than just a bit of a purist, one might say. I now say a fanatic about lifestyle, with a modicum of heart. Why? Because I bought local red hard winter wheat, that of course was organic. I ground it myself. then I made the seitan. Well for this article, I have come half way, as that is how I would do it myself these days. It’s basically the same procedure but the pre-ground flour has just so many more advantages. One that I can think of right off the top is that the gluten is easier to extract. Oh yes, I thought I should add, the reason I stopped making seitan
| Note: One can also get gluten flour and you can make seitan in a quarter of the time by just adding water and boiling the mass of gluten. – bri |
at home was, that it can do an awful lot of damage to the sewer system. It can clog it right up. Easier to buy the stuff, but not as much fun! It is also not the best nutritionally. But for those that want simulated, homemade, organic bacon bits, seems to me the best way to go.
Basic Seitan Recipe:
Now, if your like me, you want organic, so consider this an organic experience. You can take as much or as little flour as you like or need. I used to go more by ratio than precise measurements. I will try to get the measurements as close to true here as possible, but it is manly in the look and feel of the dough, you might want to call it.

Equipment:
Ingredients:
1 k organic bread flour
475 ml clean clear water
Savoury Herbs to taste – i.e.
few ml extra virgin olive oil, to coat the bottom of pot.
More water for broth, about 1.5 to 2 litres.
Instructions:
As I stated earlier, I go more by ratio and eye than measure on this, as it is not rocket science. I would start with about 375ml, or so, of liquid. Add another, maybe 100 mls water to that, a little at a time, working it in until you get a fairly wet dough.
Once your dough is formed, into what basically looks like a bread dough, although a bit wetter, not much however, you can let it sit for about 20 min or so. Raymond Calvel, the authority on bread making in France Recommends, This helps the development of the gluten. The gluten is exactly what it is we are after, as that is what our seitan is.
Broth:
While the dough is sitting you can put your pot on the stove at medium heat. Start chopping some onions, and preparing some herbs – i.e. herbs de Provence , rosemary, sage, pepper. I wouldn’t suggest salt at this stage, as I am unsure of the effect on the seitan. Add water to about ¾ full and heat to low boil.
Back to the Dough:
Once the dough has set for 20 minutes, take it and work it a while longer, until you feel that it has developed full potential as far as gluten development. In other words, if you keep on kneading and it doesn’t get any stiffer, then we go to the next step.
Next Step:
Take the dough, in the bowl, over to the sink and place the bowl, slightly tilted into the sink. Then start, slowly, running cool water – not too cold as your hands will be in it, but too not hot either. As the water runs, keep on kneading the dough and letting the bran flow into the sieve. This will catch much of the bran, that you can put into another bowl, or container if you wish. I did this by slapping the upturned sieve on the edge of the bowl. You may find some of the gluten in this mix, so just retrieve, as much as possible, leaving the bran, and put it back into to main bowl and keep on kneading.
Eventually – five minutes or so – you should start to get a ball of gluten. This is what you are aiming for.
Now that your gluten is formed, place it into the pot, with the broth, on the stove and bring to a gentle boil. When it rises to the top, it is done.
Of course one last question would probably be, what do you do with this after it is made. Well that is another article. I will be doing an article based on the question, how does one make vegan bacon bits? That article will be coming out in a few days.
– bri
February 16, 2011
health and wellbeing 3 Comments
by
Brian Morin
Preparations for a single brewing:
 The utmost care should be taken when making your tea in order to avoid contamination. Make sure that your hands, right up to your mid forearm, are clean. Choose a quiet, well ventilated spot for your kombucha to ferment, away from drafts, sunlight and vibration (away from machinery fridge, washing machine, dryer – would you like to live next to any of these things?). When deciding which bowl to use, select one that is glass, porcelain… china or blazed earthenware or pottery. If you decide to use glass, select “virgin” glass without any engraving or embossing where ‘itty bitty things’ could crawl into. The container is important because kombucha acts as a detoxifier. In other words, whatever can leach out of the container you use you can be sure the kombucha will suck it out. Next you will be the one drinking it and ingesting it in your system so be sure all equipment is clean… I use 3% food grade hydrogen peroxide (H2 O2) or apple cider vinegar in a small spray bottle, expressly for that purpose I mist my bowl, pot and my hands spoons and anything else I am going to use, you can even spray the counter.
You Will Need:
A large clear glass bowl of 5 liters (about 5 quart) plus capacity without markings or designs and not made from recycled glass or crystal. Or I use a 4 liter (about 4 quart) Deli jar and find it a very good choice.
A piece of cloth (white) made from pure cotton, hemp or linen, freshly laundered and/or rinsed in 3% H2O2 or apple cider vinegar, Cheese cloth is too porous to use, unless you fold it four or five times on itself, and never use synthetics. Some of you might like to use paper towels.
Detailed recipe: Brewing a single 3 to 5 liter (about 3 to 5 quarts) batch of Kombucha
Fill your pot with 3.5 liters (3.5 quarts) of clean, clear water (distilled, well water purified or non chlorinated) in your stainless steel or glass pot, 250 ml (1cup) of organic sucannat or regular white granulated cane sugar; If you use other sugars you risk losing your kombucha, stir and bring to a boil for 3 to 5 minutes only, (if you have a thermometer bring to 82° C (180° F) at start counting your 3 to 5 minutes). Remove from heat and add tea or tea bags Allow to steep for 10 to 15 minutes only. If you find the results too strong, either change your herbal mixture or steep for 10 minutes rather than 15 minutes.
Cool Tea: Cool down process
Let tea cool to between 30° to 35° C (85° to 95° F) which is just warm to the touch but not too hot to burn. If you want to speed this process up, put your pot in the sink and fill the sink with cold water up to the level of the tea in the pot. It shouldn’t take more than 20 odd minutes for your tea to come to temperature. Alternatively you can let your tea cool on the counter it may take up to 4 or 5 hours or so. Now you can fill your bowl or Deli jar with the tea. Add 110 to 130 ml ( about ½ a cup) of liquid from the previous batch and add your Kombucha. Finally cover with your natural cloth and secure with rubber band or string.
Fermentation Process: Where, how warm and how long, etc.
Place the covered bowl in a quite and shaded area with adequate air circulation and a temperature of between 23° and 28° (72° to 82° F) Celsius temperature (this is ideal 19° C is also ok but it will take a bit longer, about 10 days or so under those conditions).
Using your kombucha culture tea:
The amount of tea you use is totally up to you and your needs. If you have some sort of chronic condition, get the book* I recommended on the last page. Other wise try to determine how much tea you have, and how much you can use per day in order to come out with some left by the time your next culture is ready. Drinking Kombucha should be kind of a ceremony. It is recommended to sip and savour this beverage, as it interacts and works in the mouth as well. For additional uses: and there are many, call me, or get the book*.
Quick Reference
Sample recipe
3.5 L filtered water (3.25 L of water with 4 l (4 quart) Delhi jar) 4 bags Black Tea [Japanese or other black tea (i.e. Tetley, Salada, etc.)] 1 bag green, nettle or Raspberry leaf tea. If you decide to use to more commercial brands and you find you like kombucha, please consider going up to a finer quality of tea, if it is possible as it will afford you better results.
250 ml Organic sucannat or white sugar
125 to 250 ml (½ to 1 cup) previous batch of kombucha tea 1 kombucha mushroom
Bring the water to a boil Simmer the water for 5 minutes only. Take off burner, add tea and let steep for 10 to 15 minutes only (If you find the results too strong either change your herbal mixture or steep for 10 minutes rather than 15 minutes). Strain out tea and cool liquid to about 24° C. Transfer into 4 to 5 liter glass container. Add about 250 ml (1cup) of previous batch too the new batch and place mushroom on top. It will settle on its own. Put in a place where there is no smoke and the temperature remains between 15° and 21° C. not higher and not lower (the lower temperatures will take longer to ferment and variations and the higher temperatures will cause the kombucha to be a bit unshapely, not to worry it will not hurt anything. Cover with a muslin or cloth and let sit for 5 to 14 days (cooler temperatures longer warmer temperatures shorter fermentation time, also the longer the fermentation the less sugar content).
Note: For more information on your choices of herbs and teas, etc. to use, you should check out the book “Kombucha the Miracle Fungus” by Harald W. Tietze ISBN 0 646 23106 5. Give this number to your book seller and he/she will tell you if they can get it. If not go to one of the bigger book stores. I found it listed on Amazon (15/02/11)
If you are looking for a mushroom you can probably find one at your local health food store, at least an ad for one on the bulletin board. If not, you can contact me and we can probably work something out as I just charge for my expenses, packaging post etc. in advance though.
Addendum: I did a conversion of the transport rate. This does not include packaging, but I don’t feel that could be much.
14.4 CAD
(CAD = Canadian dollar)
Date: EUR = European Euro Exchange rate:
18 Feb 2011 10.71 EUR 0.7440 (1.3440)
If anyone would like to see for themselves:
http://www.bankofcanada.ca/en/rates/exchform.html
Brian Morin


